
环境
- centos7.6
- 三台虚拟机,一个master,2个node
- 192.168.0.11 master
- 192.168.0.12 node
- 192.168.0.13 node
- pod网络
- 10.244.0.0/16
- service 网络
- 172.17.0.0/16
配置环境
- 对三台虚拟机同时配置
关闭防火墙和selinux
# 关闭selinxu
vi /etc/selinux/config
...
SELINUX=disabled
...

# 关闭防火墙
systemctl stop firewalld
systemctl disable firewalld
关闭swap交换空间
# 临时关闭
swapoff -a

# 永久关闭(自己vi打开/etc/fstab,注释掉swap那行就行)
sed -i '/swap/s/^\(.*\)$/#\1/g' /etc/fstab

# 查看swap是否关闭,swap 都为0就是关闭了
free -m
修改hostname
# 三台机器依此执行
 hostnamectl set-hostname homelab-0-11.host.com
 hostnamectl set-hostname homelab-0-12.host.com
 hostnamectl set-hostname homelab-0-13.host.com

# 在三台机器/etc/hosts添加,后面做bind9自建dns就不需要了
192.168.0.11 homelab-0-11.host.com
192.168.0.12 homelab-0-12.host.com
192.168.0.13 homelab-0-13.host.com
设置ipv4流量转发到iptable
- docker默认的网络模式是桥接,如果没有配置将docker的ipv4流量转发到iptable,会导致docker容器不能访问外网,并且docker run的时候会出现warning:net.ipv4.ip_forward xxx
[root@homelab-0-11 ~]# yum install -y bridge-utils.x86_64
[root@homelab-0-11 ~]# modprobe  br_netfilter
[root@homelab-0-11 ~]# cat <<EOF | tee /etc/sysctl.d/k8s.conf
net.ipv4.ip_forward = 1
net.bridge.bridge-nf-call-ip6tables = 1
net.bridge.bridge-nf-call-iptables = 1
EOF
[root@homelab-0-11 ~]# sysctl -p /etc/sysctl.d/k8s.conf
安装docker
- 三台都需要安装
# 依赖
yum install yum-utils device-mapper-persistent-data lvm2 -y

# 设置稳定的仓库
yum-config-manager --add-repo \
  https://download.docker.com/linux/centos/docker-ce.repo

# 查看需要安装的版本
yum list docker-ce --showduplicates | sort -r

# 安装20版本
yum install docker-ce-20.10.9-3.el7 docker-ce-cli-20.10.9 containerd.io-1.2.10 -y


# 配置docker加速
mkdir /etc/docker

# 这里systemd 是因为kubelet需要cgroupdriver为systemd
vi /etc/docker/daemon.json
{
  "registry-mirrors": ["https://docker.mirrors.ustc.edu.cn"],
  "exec-opts": ["native.cgroupdriver=systemd"]
}

# 开机启动docker
systemctl enable docker && systemctl restart docker
安装kubelet、kubectl、k8s
- master节点执行下面的操作
配置kubelet源(三台机器都需要配置)
[root@homelab-0-11 ~]#  cat << EOF > /etc/yum.repos.d/kubernetes.repo
[kubernetes]
name=Kubernetes
baseurl=https://mirrors.aliyun.com/kubernetes/yum/repos/kubernetes-el7-x86_64/
enabled=1
gpgcheck=1
repo_gpgcheck=1
gpgkey=https://mirrors.aliyun.com/kubernetes/yum/doc/yum-key.gpg https://mirrors.aliyun.com/kubernetes/yum/doc/rpm-package-key.gpg
EOF

[root@homelab-0-11 ~]#  yum install -y kubelet-1.22.3 kubeadm-1.22.3 kubectl-1.22.3 --disableexcludes=kubernetes

# 设置开机启动
[root@homelab-0-11 ~]#  systemctl enable --now kubelet
kubeadm init安装master节点信息(只在master上执行)
方法一:kubeadm init直接执行
kubeadm init  --kubernetes-version=v1.22.3  --image-repository=registry.aliyuncs.com/google_containers --service-cidr=172.17.0.0/16 --pod-network-cidr=10.244.0.0/16 --apiserver-advertise-address=192.168.0.11

选项说明:
  --image-repository:选择用于拉取镜像的镜像仓库(默认为“k8s.gcr.io” )
  --kubernetes-version:选择特定的Kubernetes版本(默认为“stable-1”)
  --service-cidr:为服务的VIP指定使用的IP地址范围(默认为“10.96.0.0/12”)
  --pod-network-cidr:指定Pod网络的IP地址范围。如果设置,则将自动为每个节点分配CIDR。
  --apiserver-advertise-address 指定apiservier地址,这里写的是master node地址


# 出现如下结果表示成功了!
Your Kubernetes control-plane has initialized successfully!

To start using your cluster, you need to run the following as a regular user:

  mkdir -p $HOME/.kube
  sudo cp -i /etc/kubernetes/admin.conf $HOME/.kube/config
  sudo chown $(id -u):$(id -g) $HOME/.kube/config

Alternatively, if you are the root user, you can run:

  export KUBECONFIG=/etc/kubernetes/admin.conf

You should now deploy a pod network to the cluster.
Run "kubectl apply -f [podnetwork].yaml" with one of the options listed at:
  https://kubernetes.io/docs/concepts/cluster-administration/addons/

Then you can join any number of worker nodes by running the following on each as root:

kubeadm join 192.168.0.11:6443 --token 96hdcd.4boeyw614vlkeogz \
	--discovery-token-ca-cert-hash sha256:0c8c150eaa555314ca4a5a466fff69523ee97f83470de0d2585cdb0a48a333db
方法二:创建config文件执行
# 生产配置文件 修改三个地方,主节点IP,镜像仓库 ,配置 pod 、service网段
[root@homelab-0-11 ~]# kubeadm config print init-defaults --kubeconfig ClusterConfiguration > kubeadm-master.config
apiVersion: kubeadm.k8s.io/v1beta3
bootstrapTokens:
- groups:
  - system:bootstrappers:kubeadm:default-node-token
  token: abcdef.0123456789abcdef
  ttl: 24h0m0s
  usages:
  - signing
  - authentication
kind: InitConfiguration
localAPIEndpoint:
  #修改为主节点IP,这里注意,如果是多master节点,这个改为vip地址
  advertiseAddress: 192.168.0.11
  bindPort: 6443
nodeRegistration:
  criSocket: /var/run/dockershim.sock
  imagePullPolicy: IfNotPresent
  name: homelab-0-11
  taints: null
---
apiServer:
  timeoutForControlPlane: 4m0s
apiVersion: kubeadm.k8s.io/v1beta3
certificatesDir: /etc/kubernetes/pki
clusterName: kubernetes
controllerManager: {}
dns: {}
etcd:
  local:
    dataDir: /var/lib/etcd
#修改镜像仓库
imageRepository: registry.aliyuncs.com/google_containers
kind: ClusterConfiguration
kubernetesVersion: 1.22.3
networking:
  # 配置 pod 所在网段和虚拟机所在网段不重复(这里用的是Flannel 默认网段),如果宿主机已经使用该网段,则必须更改网段
  podSubnet: 10.244.0.0/16
  dnsDomain: cluster.local
  serviceSubnet: 172.17.0.0/16
scheduler: {}

# 查看需要下载的镜像
[root@k8s-master-10 ~]# kubeadm config images list --config kubeadm-master.config
registry.aliyuncs.com/google_containers/kube-apiserver:v1.22.3
registry.aliyuncs.com/google_containers/kube-controller-manager:v1.22.3
registry.aliyuncs.com/google_containers/kube-scheduler:v1.22.3
registry.aliyuncs.com/google_containers/kube-proxy:v1.22.3
registry.aliyuncs.com/google_containers/pause:3.5
registry.aliyuncs.com/google_containers/etcd:3.5.0-0
registry.aliyuncs.com/google_containers/coredns:v1.8.4
# 下载镜像
[root@k8s-master-10 ~]# kubeadm config images pull --config kubeadm-master.config

# 步骤二:初始化k8s
[root@k8s-master-10 ~]# kubeadm init --config=kubeadm-master.config --upload-certs | tee kubeadm-init.log
创建kubectl配置文件
[root@homelab-0-11 ~]#  mkdir -p $HOME/.kube
[root@homelab-0-11 ~]# sudo cp -i /etc/kubernetes/admin.conf $HOME/.kube/config
[root@homelab-0-11 ~]# sudo chown $(id -u):$(id -g) $HOME/.kube/config
[root@homelab-0-11 ~]# kubectl get pods
No resources found in default namespace.
[root@homelab-0-11 ~]# kubectl get ns
NAME              STATUS   AGE
default           Active   3m10s
kube-node-lease   Active   3m12s
kube-public       Active   3m12s
kube-system       Active   3m12s

# 这里controller-manager   Unhealthy 看文章最后面怎么解决的,这个不影响使用
[root@homelab-0-11 manifests]# kubectl get cs
Warning: v1 ComponentStatus is deprecated in v1.19+
NAME                 STATUS      MESSAGE
        ERROR
controller-manager   Unhealthy   Get "https://127.0.0.1:10257/healthz": dial tcp 127.0.0.1:10257: connect: connection refused
etcd-0               Healthy     {"health":"true","reason":""}

scheduler            Healthy     ok
node节点加入集群
kubeadm join 192.168.0.11:6443 --token 96hdcd.4boeyw614vlkeogz \
	--discovery-token-ca-cert-hash sha256:0c8c150eaa555314ca4a5a466fff69523ee97f83470de0d2585cdb0a48a333db

# 上述命令可以通过在master节点执行下面的命令获取到
kubeadm token create --print-join-command

# 验证是否加入成功,在master节点执行
[root@homelab-0-11 ~]# kubectl get nodes
NAME                    STATUS     ROLES                  AGE     VERSION
homelab-0-11.host.com   NotReady   control-plane,master   122m    v1.22.3
homelab-0-12.host.com   NotReady   <none>                 6m37s   v1.22.3
homelab-0-13.host.com   NotReady   <none>                 5m45s   v1.22.3
给node节点打上label
[root@homelab-0-11 ~]# kubectl label node homelab-0-12.host.com node-role.kubernetes.io/node=node
[root@homelab-0-11 ~]# kubectl label node homelab-0-13.host.com node-role.kubernetes.io/node=node
[root@homelab-0-11 ~]# kubectl get nodes
NAME                    STATUS     ROLES                  AGE    VERSION
homelab-0-11.host.com   NotReady   control-plane,master   127m   v1.22.3
homelab-0-12.host.com   NotReady   node                   11m    v1.22.3
homelab-0-13.host.com   NotReady   node                   10m    v1.22.3

# 如果加错了可以删除label,只需要在命令行最后指定label的key名,并加一个减号即可:
kubectl label node homelab-0-12.host.com node-role.kubernetes.io/node-
安装网络插件
- kubectl get nodes 可以看到这里的status状态都是NotReady,是因为它们网络不同,需要安装网络插件,才能使得容器跨主机通信
[root@homelab-0-11 ~]# kubectl apply -f https://raw.githubusercontent.com/coreos/flannel/master/Documentation/kube-flannel.yml
# 这里从init到running的状态需要20分钟的样子
[root@homelab-0-11 ~]# kubectl get pods -A | grep flannel
kube-system            kube-flannel-ds-f6qgv                           1/1     Running   0          32m
kube-system            kube-flannel-ds-fbn65                           1/1     Running   0          32m
kube-system            kube-flannel-ds-tkgtf                           1/1     Running   0          32m

# 再看node的状态 全部是Ready
[root@homelab-0-11 ~]# kubectl get node
NAME                    STATUS   ROLES                  AGE    VERSION
homelab-0-11.host.com   Ready    control-plane,master   3h9m   v1.22.3
homelab-0-12.host.com   Ready    node                   73m    v1.22.3
homelab-0-13.host.com   Ready    node                   72m    v1.22.3
测试网络是否通了
# 进入busybox容器运行
[root@homelab-0-11 ~]#  kubectl run test1 -it --rm --image=busybox:1.28.3
输入:nslookup kubernetes

# 输出结果如下就是成功了
/ # nslookup kubernetes
Server:    172.17.0.10
Address 1: 172.17.0.10 kube-dns.kube-system.svc.cluster.local

Name:      kubernetes
Address 1: 172.17.0.1 kubernetes.default.svc.cluster.local
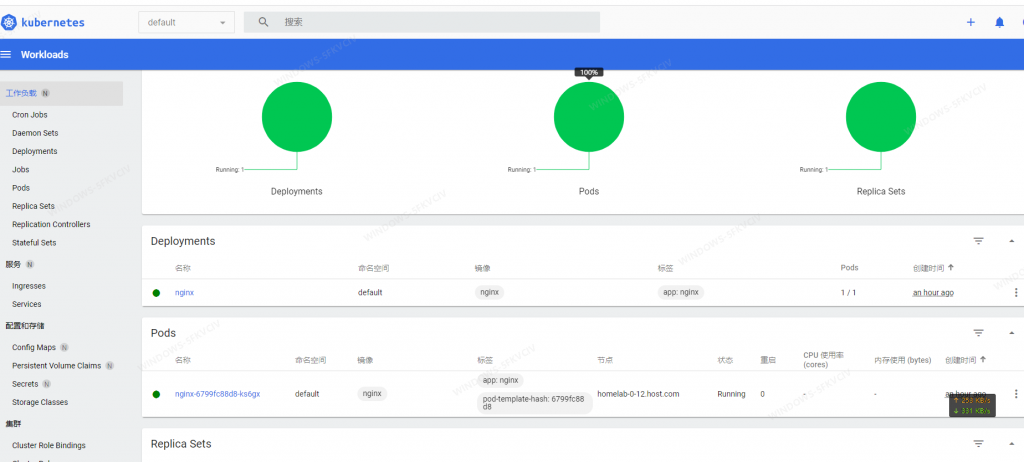
部署nginx服务
[root@homelab-0-11 ~]# kubectl create deployment nginx --image=nginx
[root@homelab-0-11 ~]#  kubectl expose deployment nginx --port=80 --type=NodePort
[root@homelab-0-11 ~]# kubectl get svc
NAME         TYPE        CLUSTER-IP       EXTERNAL-IP   PORT(S)        AGE
kubernetes   ClusterIP   172.17.0.1       <none>        443/TCP        3h15m
nginx        NodePort    172.17.172.101   <none>        80:32264/TCP   50m
[root@homelab-0-11 ~]# curl 172.17.172.101
<!DOCTYPE html>
<html>
<head>
<title>Welcome to nginx!</title>
<style>
html { color-scheme: light dark; }
body { width: 35em; margin: 0 auto;
font-family: Tahoma, Verdana, Arial, sans-serif; }
</style>
</head>
<body>
<h1>Welcome to nginx!</h1>
<p>If you see this page, the nginx web server is successfully installed and
working. Further configuration is required.</p>

<p>For online documentation and support please refer to
<a href="http://nginx.org/">nginx.org</a>.<br/>
Commercial support is available at
<a href="http://nginx.com/">nginx.com</a>.</p>

<p><em>Thank you for using nginx.</em></p>
</body>
</html>

# 同样的,你可以在本地访问
http://192.168.0.11:32264/
http://192.168.0.12:32264/
http://192.168.0.13:32264/
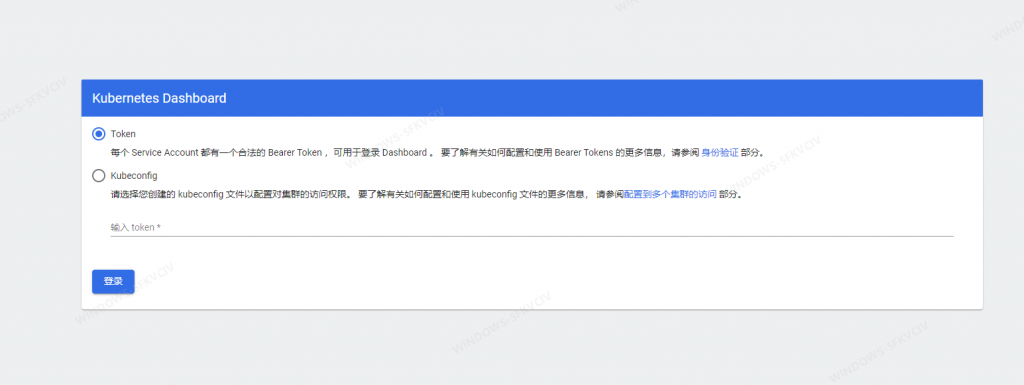
安装kube-dashboard
kubectl apply -f https://raw.githubusercontent.com/kubernetes/dashboard/v2.3.1/aio/deploy/recommended.yaml

[root@homelab-0-11 ~]# kubectl get pods -n kubernetes-dashboard
NAME                                         READY   STATUS    RESTARTS   AGE
dashboard-metrics-scraper-856586f554-2z4nw   1/1     Running   0          57m
kubernetes-dashboard-67484c44f6-jz72g        1/1     Running   0          57m

# 修改对外暴露端口,修改倒数第三行的样子,type:ClusterIP改为 type: NodePort
[root@homelab-0-11 ~]# kubectl edit svc kubernetes-dashboard -n kubernetes-dashboard
  type: NodePort
status:
  loadBalancer: {}

# 查看外部访问端口,这里为30995
[root@homelab-0-11 ~]# kubectl get svc  -n kubernetes-dashboard
NAME                        TYPE        CLUSTER-IP       EXTERNAL-IP   PORT(S)         AGE
dashboard-metrics-scraper   ClusterIP   172.17.51.27     <none>        8000/TCP        59m
kubernetes-dashboard        NodePort    172.17.153.184   <none>        443:30995/TCP   59m
- 配置dashboard token
[root@homelab-0-11 ~]# vi token.yaml
apiVersion : v1
kind : ServiceAccount
metadata :
  name : admin-user
  namespace : kubernetes-dashboard
---
apiVersion: rbac.authorization.k8s.io/v1
kind: ClusterRoleBinding
metadata:
  name: admin-user
roleRef:
  apiGroup: rbac.authorization.k8s.io
  kind: ClusterRole
  name: cluster-admin
subjects:
- kind: ServiceAccount
  name: admin-user
  namespace: kubernetes-dashboard
[root@homelab-0-11 ~]#  kubectl apply -f token.yaml
serviceaccount/admin-user created
clusterrolebinding.rbac.authorization.k8s.io/admin-user created
[root@homelab-0-11 ~]# kubectl -n kubernetes-dashboard get secret $(kubectl -n kubernetes-dashboard get sa/admin-user -o jsonpath="{.secrets[0].name}") -o go-template="{{.data.token | base64decode}}"

参考文章
- https://juejin.cn/post/6844904095778603022
- https://www.cpweb.top/1644
- https://fang.readthedocs.io/zh_CN/latest/K8S%E5%AD%A6%E4%B9%A0/%E4%BD%BF%E7%94%A8kubeadm%E5%B7%A5%E5%85%B7%E5%BF%AB%E9%80%9F%E5%AE%89%E8%A3%85k8s%E9%9B%86%E7%BE%A4.html
错误解决
- 如果已经安装成功了不需要看
错误1:Get “http://localhost:10248/healthz”: dial tcp [::1]:10248: connect: connection refused.
[kubelet-check] Initial timeout of 40s passed.
[kubelet-check] It seems like the kubelet isn't running or healthy.
[kubelet-check] The HTTP call equal to 'curl -sSL http://localhost:10248/healthz' failed with error: Get "http://localhost:10248/healthz": dial tcp [::1]:10248: connect: connection refused.
[kubelet-check] It seems like the kubelet isn't running or healthy.
[kubelet-check] The HTTP call equal to 'curl -sSL http://localhost:10248/healthz' failed with error: Get "http://localhost:10248/healthz": dial tcp [::1]:10248: connect: connection refused.
解决方法:
这个错误是kubelet没有启动成功,看下你的/etc/docker/daemon.json 有没有指定native.cgroupdriver=systemd,没有就粘贴如下内容:
[root@homelab-0-13 ~]# cat /etc/docker/daemon.json
{
"registry-mirrors": ["https://docker.mirrors.ustc.edu.cn"],
"exec-opts": ["native.cgroupdriver=systemd"]
}
错误二:that the pod didn”t tolerate
[root@homelab-0-11 ~]# kubectl get pods nginx-6799fc88d8-ks6gx -o yaml
...
message: '0/3 nodes are available: 1 node(s) had taint {node-role.kubernetes.io/master:
      }, that the pod didn''t tolerate, 2 node(s) had taint {node.kubernetes.io/not-ready:
      }, that the pod didn''t tolerate.'
解决方法:
这个是节点没有ready,可以kubectl get node查看node状态,再看下是否安装了cni网络插件
错误三:controller-manager Unhealthy Get “https://127.0.0.1:10257/healthz”: dial tcp 127.0.0.1:10257: connect: connection refused
解决方法:
[root@homelab-0-11 manifests]# cd /etc/kubernetes/manifests
# 修改kube-controller-manager.yaml和kube-scheduler.yaml 将里面的--port=0注释掉就行
[root@homelab-0-11 manifests]# more kube-scheduler.yaml
apiVersion: v1
kind: Pod
metadata:
  creationTimestamp: null
  labels:
    component: kube-scheduler
    tier: control-plane
  name: kube-scheduler
  namespace: kube-system
spec:
  containers:
  - command:
    - kube-scheduler
    - --authentication-kubeconfig=/etc/kubernetes/scheduler.conf
    - --authorization-kubeconfig=/etc/kubernetes/scheduler.conf
    - --bind-address=127.0.0.1
    - --kubeconfig=/etc/kubernetes/scheduler.conf
    - --leader-elect=true
    # - --port=0
    image: registry.aliyuncs.com/google_containers/kube-scheduler:v1.22.2
    imagePullPolicy: IfNotPresent

[root@homelab-0-11 manifests]# more kube-controller-manager.yaml
apiVersion: v1
kind: Pod
metadata:
  creationTimestamp: null
  labels:
    component: kube-controller-manager
    tier: control-plane
  name: kube-controller-manager
  namespace: kube-system
spec:
  containers:
  - command:
    - kube-controller-manager
    - --allocate-node-cidrs=true
    - --authentication-kubeconfig=/etc/kubernetes/controller-manager.conf
    - --authorization-kubeconfig=/etc/kubernetes/controller-manager.conf
    - --bind-address=127.0.0.1
    - --client-ca-file=/etc/kubernetes/pki/ca.crt
    - --cluster-cidr=10.244.0.0/16
    - --cluster-name=kubernetes
    - --cluster-signing-cert-file=/etc/kubernetes/pki/ca.crt
    - --cluster-signing-key-file=/etc/kubernetes/pki/ca.key
    - --controllers=*,bootstrapsigner,tokencleaner
    - --kubeconfig=/etc/kubernetes/controller-manager.conf
    - --leader-elect=true
    # - --port=0
    - --requestheader-client-ca-file=/etc/kubernetes/pki/front-proxy-ca.crt
    - --root-ca-file=/etc/kubernetes/pki/ca.crt
    - --service-account-private-key-file=/etc/kubernetes/pki/sa.key
# 重启两个服务
[root@homelab-0-11 manifests]# kubectl apply -f kube-controller-manager.yaml
[root@homelab-0-11 manifests]# kubectl apply -f kube-scheduler.yaml
[root@homelab-0-11 manifests]# kubectl get cs
Warning: v1 ComponentStatus is deprecated in v1.19+
NAME                 STATUS    MESSAGE                         ERROR
scheduler            Healthy   ok
controller-manager   Healthy   ok
etcd-0               Healthy   {"health":"true","reason":""}
错误四:kube-controller-manager 0/1 CrashLoopBackOff
[root@k8s-manage conf.d]# kubectl get pods --all-namespaces
NAMESPACE              NAME                                            READY   STATUS             RESTARTS          AGE
default                mysql-v8-74868d7db4-pxkml                       0/1     CrashLoopBackOff   200 (2m56s ago)   26h
default                nginx-6799fc88d8-ks6gx                          1/1     Running            2 (7h58m ago)     28h
kube-system            coredns-7f6cbbb7b8-n6npj                        1/1     Running            2 (8h ago)        30h
kube-system            coredns-7f6cbbb7b8-r8b5w                        1/1     Running            2 (8h ago)        30h
kube-system            etcd-homelab-0-11.host.com                      1/1     Running            2 (8h ago)        30h
kube-system            kube-apiserver-homelab-0-11.host.com            1/1     Running            2 (8h ago)        30h
kube-system            kube-controller-manager                         0/1     CrashLoopBackOff   14 (64s ago)      48m
kube-system            kube-controller-manager-homelab-0-11.host.com   1/1     Running            1 (56m ago)       56m
kube-system            kube-flannel-ds-f6qgv                           1/1     Running            7 (7h51m ago)     28h
kube-system            kube-flannel-ds-fbn65                           1/1     Running            2 (8h ago)        28h
kube-system            kube-flannel-ds-tkgtf                           1/1     Running            2 (7h58m ago)     28h
kube-system            kube-proxy-7whnz                                1/1     Running            2 (7h56m ago)     28h
kube-system            kube-proxy-p6f7c                                1/1     Running            2 (8h ago)        30h
kube-system            kube-proxy-wxs94                                1/1     Running            3 (7h58m ago)     28h
kube-system            kube-scheduler                                  1/1     Running            2 (7h58m ago)     21h
kube-system            kube-scheduler-homelab-0-11.host.com            1/1     Running            2 (8h ago)        21h
kubernetes-dashboard   dashboard-metrics-scraper-856586f554-2z4nw      1/1     Running            2 (8h ago)        28h
kubernetes-dashboard   kubernetes-dashboard-67484c44f6-jz72g           1/1     Running            2 (8h ago)        28h

# 查看docker logs错误信息
[root@k8s-manage conf.d]# kubectl logs kube-controller-manager -n kube-system
Flag --port has been deprecated, This flag has no effect now and will be removed in v1.24.
I1119 07:59:26.893599       1 serving.go:347] Generated self-signed cert in-memory
unable to create request header authentication config: open /etc/kubernetes/pki/front-proxy-ca.crt: no such file or directory

# 查看pod yaml信息,可以发下它部署到node节点上去了192.168.0.13
[root@k8s-manage conf.d]# kubectl get pods kube-controller-manager  -n kube-system -o yaml
    state:
      waiting:
        message: back-off 5m0s restarting failed container=kube-controller-manager
          pod=kube-controller-manager_kube-system(891ee140-4b65-4455-aec5-f8b9c72de417)
        reason: CrashLoopBackOff
  hostIP: 192.168.0.13
  phase: Running
  podIP: 192.168.0.13
  podIPs:
  - ip: 192.168.0.13
  qosClass: Burstable
  startTime: "2021-11-19T07:12:18Z"
- 这个错误暂时待解决,主要问题是为啥部署到node(192.168.0.13)节点上去了,kube-controller-manager不都是在master节点吗,需要给master添加污点,然后修改kube-controller-manager.yaml 允许容忍污点即可
原创文章,作者:站长,如若转载,请注明出处:https://wsppx.cn/2066/%e7%bd%91%e7%bb%9c%e5%bc%80%e5%8f%91/
 微信扫一扫
微信扫一扫
相关推荐
-
记录一次go mod tidy/go get安装私库错误信息
执行语句 go get -u codeup.aliyun.com/xxxx/commonlib 错误信息如下 解决方式 问题原因是没有权限访问这个,如果是阿里云的codeup平台,…
-
golang同目录调用其他文件函数的用法
问题复现 解决方法 这个应该是新手常见的问题,golang的包管理方式,这个运行错误是由于你执行了main.go,而没有编译其他go文件,当然不知道run函数哪里来的 正确方式 g…
-
前端面试题—平安前端面试题
1.mixin混入,以后自身生命周期和混入周期的具体实现,mixin的具体实现 定义:分发vue中可复用的功能,本质是一个js对象,它可以包含我们组件中任意功能选项,如data、c…
-
Docker安装Jenkins
简介 在开发过程中,devops搭建,ci集成工具选择Jenkins是不二之选 安装 安装docker centos7 创建jenkins目录 运行docker 如果用做cicd,…
-
前端学习记录之三:手写Promise源码
一、初始化版本 1.Promise 就是一个类 在执行这个类的时候 需要传递一个(回调函数)执行器进去 执行器立即执行 2.Promise有三种状态 fulfilled rejec…
-
python后端开发面试-redis缓存
默认16个数据库 五中数据结构 string list(列表) set(集合) zset(有序列表) hash(字典) 理解穿透、击穿、雪崩及其处理方法 redis怎样实现分布式锁…
-
golang基础面试题
自己除了找python相关的岗位,还想找一下go的岗位,有转语言的倾向。但我自由半年的项目经验。 谈谈对defer的认识 defer用于资源的释放,会在函数返回之前进行调用,它会经…